Pages

Sunday, December 25, 2011

Garden update - December 2011


I have discovered which parts of my garden are better for different types of plants. This is handy to know for when I plant these again next year. For example, the sweetcorn planted near the eastern fence next to the lemon tree gets lots of sunlight at this time of year, and is growing really tall and has large cobs on it. However, the sweetcorn by the back fence (south) is shaded by the trees and the shed, so they are still small as are the cobs on them. The pumpkin next to it loves that position, but the rockmelon on the eastern fence is doing much better than the one by the back fence. I seem to have picked the right place for the capsicum, tomatoes and zucchini, as they are all doing well.

Merry Christmas everybody


I hope you all had a lovely Christmas. Our little boy got thoroughly spoilt by everyone who sent presents. He even received a cash register to replace the cardboard one I made, which is just as well as it was looking a bit shabby. He has also been enjoying the indoor cubby house built out of the cardboard boxes that our solar panels came in and playing in the sandpit that we made him for Christmas.
For Christmas lunch I made a platter of South Australian prawns, crumbed calamari and fish cakes, ham, and a tropical salad made of mangoes, mint, cherry tomatoes, cheese and avocado. It was delicious and fed the three of us for less than $20. (I'm not sure exactly how much it cost)I forgot to take a photo of it before we ate it. It just goes to show that you can still have a decadent lunch without spending a fortune if you buy local produce (prawns, cherry tomatoes), grow your own produce (mint) and use anything given to you (ham and cheese). The only extravagance was the mangoes and the battered seafood pack I got from the supermarket. I have also made my own fruit mince pies and shortbread biscuits. Needless to say, all I have done is eat!

Wednesday, December 21, 2011

What to do with all that Christmas Ham?

Each year my husband's employer gives the staff a hamper for Christmas, including a huge ham. The ham is way to big for the three of us, so I end up carving it up and freezing it. Frozen ham tends to be a bit watery, but it is better than wasting it. The night that I carved the ham I kept some aside to make this recipe. I did this in the slow cooker, but you could do it in the oven. Recipe is adapted from My Kitchen - Slow Cooker.

Lasagne with lemon, ham and basil:

olive oil, for brushing
690ml jar tomato passata(puree)
2 garlic cloves, crushed
150g grated cheddar cheese
50g grated parmesan or romano
1 handful basil, chopped
1tsp grated lemon rind or dried lemon verbena
150 g shaved ham
250g instant lasagne sheets or fresh lasagne sheets
50g butter
1 1/2 tablespoons plain flour
2 cups milk

Lightly brush the bowl of a slow cooker with olive oil.
Mix together the passata and garlic.
Make a white sauce: melt the butter. Remove from heat and mix in the flour. Replace on the heat and cook for one minute until flour is lighter in colour. Slowly add milk, whisking to avoid making it lumpy. Continue stirring until mixture thickens. Add 125g of the grated cheddar cheese, parmesan, basil and lemon rind. Season with salt and pepper to taste.
Spoon 1/3 of the passata mixture into the slow cooker, then top with 1/3 of the ham and 1/4 of the white sauce. Arrange a single layer of lasagne sheets on top.
Repeat for the second layer.
For the final layer, spoon remaining passata, ham and another 1/4 of the white sauce and a layer of lasagne sheets into the slow cooker. Spread remaining 1/4 of the white sauce over the top and sprinkle with remaining cheddar cheese.
Cover and cook on low for 3 hours or until the pasta is tender.

I have kept the bone that the ham came on to make some pea and ham soup, although with it being summer, it is not really the weather for soup.

Cheap and Cheerful: Apricot Coconut Ice

This is a recipe from my mum. She would usually make this at Christmas and I find myself doing the same, even though there is no reason why you couldn't make this any time of the year.

Ingredients:
40g chopped dried apricots
60g chopped walnuts
1 packet coffee biscuits, crushed
6 white marshmallows, chopped
1 tsp vanilla\
400ml condensed milk.
Dessicated coconut

Method:
Mix altogether (except coconut) in a bowl. Divide into 4. Shape into logs. Roll in coconut. Wrap in plastic wrap and store in the fridge.

So simple and so delicious. I leave out the marshmallows as it makes it too sweet. I also like to put in more apricots than what the recipe says. You can also make this with other dried fruit.

Tuesday, December 20, 2011

Tips on solar panel installation and use of solar power

Yesterday we finally had our solar panels installed, and I am really glad we got some good advice.
First of all, do your homework. Don't go for the cheapest solar panel provider if you can afford to do better. They will cost you more in the long run. Having spoken to electrical contractors, looked up reviews on the internet and talked to people we know about which installer they chose, we found that many cheap operators use cheap and inferior materials to keep their costs down. They also use inexperienced or sometimes unqualified installers as well. We went with a Zen system. They're expensive but they have an excellent reputation in South Australia for the quality of the solar panels, cabling and inverters.
We had been warned that cheaper installers often use inferior cabling, which can be dangerous (making your roof "live" with electricity) and may need replacing after only a short period of time. We have found the electrical contractors to be a great source of information and advice, a good one doesn't like to work with inferior products and the electrician that was here yesterday was very good (even my husband was impressed and he cleaned up after himself!).
A good installer will also advise you of the best place to put your solar panels. We recenlty walked past a house that had solar panels on a section of the roof that was shaded by a big tree, when there were other places on the roof that would have better access to the sun. North facing (if you live in the southern hemisphere, south facing if you live in the northern hemisphere) and unshaded will give you the best results.
We were lucky that our import/export meter was installed a few weeks ago, so we could start using our solar energy the moment it was installed and switched on. Our excess energy is exported back to the grid, so our supplier advised us to use things like washing machines (and dishwashers, but we don't have one) at times when the panels are not producing energy, such as early morning or in the evening. I'm usually up fairly early so that doesn't bother me, and I washed the nappies last night. By doing it that way we are importing electricity at a time that we can't produce it, allowing us the maximum return on exporting our excess electricity usage throughout the rest of the day.
Another tip is to call your state energy commission as well as your electricity provider and ask them a few questions. My husband found some good websites advising what questions to ask. If you have an electrical hot water system, you need to check if you will still be on the off-peak tariff once solar panels are installed. A workmate of my husband found his electrity tariff went up because he went from an off-peak tariff to a peak tariff once his solar panels were installed.
Turn off the standby power on televisions, computers, microwaves, dvd players, etc. They may not use much power but it can add up to hundreds of dollars worth each year. We always turn our microwave and tv off at the wall when not in use.
Be aware that plasma tvs use a lot more power than ordinary tvs. I have a friend who used to work for a call centre for an electricity company and said she used to get lots of calls from people asking why their electricity bill was 4 times higher than usual. First thing she would ask them was had they just bought a plasma screen tv...that usually seemed to be the culprit. Check out the energy usage on electrical equipment before you buy.
Our system comes with a cool little Bluetooth display to keep on our breakfast bar. At the push of a button we can see how much energy we are producing. It doesn't seem to tell us how much we are using, which would be handy, but I can always go and look on the meter outside if I really want to know that.
Now, let the sun shine!

Building a sandpit


My husband and I struggled to think of what to get our 2 year old son for Christmas. He already has plenty of toys and will no doubt get spoilt by grandparents and other family members this Christmas, plus it was hard to tell what he really wanted. We had noticed that he wanted to play in a patch of dirt in our garden, so that gave us the idea of building him a sandpit as his Christmas present.
He had a patch of garden that we were intending to rip out anyway one day in the future when we rebuild our patio/pergola area. I started ripping out the plants last week, and my husband finished digging them out yesterday.


Then he removed the soil. The previous owners of this house had a sandpit where our shed now stands. For some reason, we decided to keep the sandpit sand and my husband has kept it covered up. He originally intended to use that sand to lay pavers where my washing line is. It turns out there was enough sandpit sand to fill the sandpit, and have some left over for topping up at a later date.


Needless to say, my son loves his sandpit, even though Christmas is still a few days away. We had trouble getting him out of it last night and a few tears were shed when he wanted to return to his sandpit after his bath just as we were about to have dinner. I expect that he will get a lot of use out of it.


It will be a few years before we redo our patio, so in the meantime he can enjoy his undercover sandpit. It's in a great spot; I can keep an eye on him and he is shaded from the sun.
We put a few of his old plastic toys that he doesn't play with much anymore, plus some sandpit toys that he was given from friends, and a few empty plastic containers. Plus, Santa might bring him something. Otherwise you don't need to buy sandpit toys, they are quite happy with any kitchen utensils or plastic containers that you can spare.

Cheap and Cheerful: Christmas biscuits


I made these biscuits for my son's playgroup break up party. I just used a basic butter biscuit recipe, but you could use any recipe you like. (Shortbread would be a nice one for adults). This butter biscuit recipe is in the CWA cookbook.

375gr flour
250gr butter
185gr sugar (I used caster sugar)
1 egg (beaten)
1/4 tsp baking powder

Mix flour, sugar and baking powder together. Rub in butter. Add egg and mix in. Roll out very thin and cut into shapes. Bake in oven at 350F/180C until a light golden brown.

Icing:
I admit I didn't make any measurements here.
Icing sugar
Food colouring
Water
Vanilla essence (optional)
Cachous or other decorations.

Mix enough water with icing sugar to make a thick paste. Add food colouring. Spread onto cold biscuits and decorate. Allow to set.

Wednesday, December 14, 2011

Home made menstrual pads

I will be giving this one a go. Go to http://www.pennilessparenting.com/2010/08/homemade-mama-cloth-menstrual-pads.html

Tuesday, December 13, 2011

Yummy Strawberries

Today my son and I picked our first strawberries. He had one and I had one...and it was the most delicious strawberry I have had in ages. In another day or two there should be some more ready to pick. I also picked one of the plums off the tree and ate that...that was yummy as well! Our plums are very small as they have been every year, probably as a result of never being fertilised! It's true what they say about home grown fruit and vegetables having much more flavour than what you buy in the shops. I counted 19 tomatoes on my tomato plants this morning, so I can't wait until they ripen! Last night I made pesto with my basil and we had bruschetta with dinner which was also delicious!

Christmas Gift Ideas; gifts that keep on giving

Stuck for a Christmas Gift idea for someone that has everything or says "Nothing" when you ask them what they want for Christmas? Here are some of the presents that I have received over the years that I love, mostly because they keep on giving long after Christmas day has been an gone.
Breadmaker - my husband bought it for Christmas 12 years ago, and it is still being used on a weekly basis. It has probably saved us a small fortune on trips to the bakery!
Overlocker - once again, another present from my husband a few years ago. Every time I use it I think what a wonderful present it was, and am considering making some children's clothes for my best friends' kids for Christmas this year. I save money by making clothes for myself and my family.
Lemon tree - last year's Christmas present from both my husband and my son. The lemons are not yet ready, but I love it because I know it will keep me supplied in yummy lemons for many years to come. It will save me money off my shopping bill!
Something home made - some lovely treat to eat may be a great present for someone you know who may be feeling the pinch financially at Christmas.
This year we are having solar panels installed 5 days before Christmas, we already have the input/output meter installed, so hopefully we will have a lovely sunny day and be generating lots of electricity on the big day!
Some of my favourite Christmas presents have come from the least expected sources - Secret Santa or Kranky Kris Kringle. Secret Santa is when you pull a name out of a hat and have to buy for that person in your workplace. I once received a serving plate made from recycled glass and loved it so much that I hoped whoever bought it for me that year would draw out my name again the following year.
Kranky Kris Kringle is when everyone buys a present, usually to the value of $5 or $10, puts it in a pile, and one by one everyone pulls out a present. Before you open your present, you have the option of stealing one that has already been opened. The person you 'steal' from then choses another present to replace it. We did that for our car club Christmas party on the weekend. My husband unwrapped a lovely soap set, which I promptly stole from him. Being on single wage family, luxuries like fancy soaps are not on the shopping list these days, so I was more than happy to receive a lovely treat of some nice soaps from the mysterious Kris Kringle to give myself a lovely bath for Christmas.
You don't need to spend a fortune. You may be surprised that the person you buy for would be happy to receive some nice soaps or a plant for the garden!

Sunday, December 11, 2011

Cinnamon Holly Biscuits


I think I got this recipe out of the Australian Women's Weekly magazine. These are a delicious and rather fancy looking Christmas themed biscuit.
Ingredients:
2 cups self raising flour
90g butter, at room temperature (or use margarine or a "soft" butter).
2 tsp cinnamon
1/2 cup brown sugar
1/4 cup golden syrup (you could try using treacle if golden syrup is not available, but the results will differ).
1 egg, lightly beaten
mint leaves (the lollie kind), red mini M&M's/glace cherries/jaffas.
2 1/2 cups pure icing sugar
100ml lemon juice

Method:
1. Place flour, butter and cinnamon in a food processor. Process until combined. Add sugar, syrup and egg until mixture comes together. Turn dough onto a floured board. Knead until smooth. Wrap in plastic and chill for 30 mins.
2. Preheat oven to 180 C (350F). Lightly grease and line baking trays.
3. Roll dough out in two portions, between 2 sheets of baking paper until 5mm thick. Using a 6cm round fluted cutter, cut rounds from dough. Repeat with remaining dough until all dough is used.
4. Place rounds onto prepared trays. Bake 8-10 mins, until firm. Cool on trays.
5. To make icing: Combine icing sugar and juice until a thick paste forms. Spread over cold biscuits.
6. Arrange mint leaves and mini M&M's onto wet icing to form holly. When set, store in an airtight container, layering between baking paper.
***I used my largest scone cutter, as I found the mint leaves are quite large. Glace cherries are a lovely, glossy red for the holly berries. Jaffas are also good but you may need to chop them in half.***

Wednesday, December 7, 2011

Forget expensive toys...cardboard boxes provide hours of fun


I love Play School on the ABC. I am constantly amazed by what they can make with a cardboard box and some masking tape. Brendon borrowed a toy shopping trolley from the local Toy Library, and I was inspired to make a cash register after seeing one made on Play School recently. I used a large Rice Bubbles box, a Special K box, a toilet roll, some paint, and masking tape of course.
The Rice Bubbles box I cut and reassembled to make the cash register, while the Special K box I cut up to make the cash drawer. I taped the toilet roll to the top of it to make the receipt roll (I even attached a receipt from the local supermarket). I painted it, then made up the display and keypad using scrap paper and a texta.
Now, this probably won't last as long as a shop bought one, but I am amazed by how much Brendon has played with it already. Yesterday we played shops for a good part of the afternoon. We put toys in the trolley (pretending they were groceries) and took them to the checkout. I wrapped a small box in wrapping paper and attached it with string to the cash register to make a scanner. I showed Brendon how to scan items then press the total button.
Today, his cars haven't even had a look-in...all he has wanted to play with are his cash register and some empty cardboard boxes that he put together to make a "train".

Tuesday, December 6, 2011

Handmade dish cloths for sale


I have some Bamboo knitted dish cloths for sale that I have made. They are $10 each plus postage (Australia only at this stage, sorry). If you are interested, you can email me at paulinestips@gmail.com (for my friends and family that have my personal email and phone numbers, you can contact me the usual way.
Here is a photo of the dish cloths. Also in this photo are some Christmas Balls, one that I knitted from the book 55 Christmas Balls to Knit and one that I crocheted from a pattern in the Australian Womens' Weekly. They aren't for sale (the knitted one is quite fiddly) but I may take orders for next Christmas.

Monday, November 28, 2011

Home made tomato sauce (ketchup)

We recently ran out of the shop bought tomato sauce and I looked through my recipe books to see if I could find a tomato sauce recipe, especially one that didn't have sugar in it. I found one in Julie Staffords Complete Taste of Life. I bought some tomatoes from the clearance shelf at my local green grocers as the ones I have growing at home are still small and green. The recipe goes as follows:
1kg tomatoes, skinned, seeded and chopped.
1 bay leaf
6 peppercorns
6 cloves (I only had ground cloves, so used about half a teaspoon)
65ml water
black pepper to taste.


I also used the recipe from my link "A use for tomato skins". To skin the tomatoes I put them in a pot of boiling water until the skins started to come off, then transferred them to a bowl of icy water. The skins came off easily. Lay the skins out on a baking tray with baking paper and dry out in a very slow oven. You may need to leave the oven door open for the moisture to escape. I had it in the warming section of my oven while I was cooking dinner. When the skins are completely dehydrated they will be very crispy. You can grind this up, add dried basil, garlic, etc and put in a spice shaker to use as flavourings for pizzas and pasta sauces.


Anyway, back to the sauce...
Place the tomatoes, bay leaf, peppercorns, cloves and water in a saucepan and bring to the boil over a high heat. Reduce the heat and simmer, covered, until the tomato is very soft. Puree by pushing through a sieve and discard the bayleaf, peppercorns and cloves (if using whole cloves). Season with black pepper. Cool and refridgerate until required.


My tips...
I have found the sauce to be very watery, not really what you want for having with your pies or in my two-year-old son's case, with your fish fingers. I think next time I will leave out the water or boil it a bit longer to make the mixture thicker.
The recipe makes about 2 1/2 cups. I have stored mine in the Tupperware sauce containers in the fridge.

Wednesday, November 23, 2011

What my mother told me, showed me, taught me.

Many of us have great mothers that we learn great things from, and we usually don't realise that until we become a mother ourselves. I know that there are some people who aren't lucky enough to have a great mother, but I am not only lucky enough to have one, I am also lucky enough to have a great mother-in-law. So here are some of the things that my mother and mother-in-law have taught me that I now use, especially in my efforts to live a more frugal lifestyle.
My mum taught me to knit and sew. She first taught me to knit when I was 12. I am now 39 and still love to knit. Over recent years she has been teaching me to sew, usually via advice over the phone as I live so far away from her.
My mum also taught me how to cook, which also started at the age of 12. I remember my first cooking lesson, it was a roast. She told me that she would give me regular cooking lessons and eventually I would have to start helping out with meals or cooking them myself, so that by the time I left home I would know how to at least cook basic meals. It was one of the best life skills she taught me, as I had many housemates who didn't know how to cook. Cooking meals yourself, especially making things from scratch, saves a lot of money.
"15 minutes of housework per day saves 3 hours on the weekend" is something my mum used to say often. She had set days that she did set tasks, and I now find myself doing the same thing. It's a great way to be frugal with your time.
My mother-in-law has taught me about gardening. She has taught me that it is better to have one or two of a particular plant and get a good crop off it, rather than have lots of plants that yield little. She has also shown me that plastic strawberry punnets make good seedling trays and the foam dishes that meat comes on from the supermarket can be washed and used at Playgroup as paint trays.
Both my mum and mother-in-law are good cooks that have given me great recipes and tips. They both have different cooking styles and tastes which gives me a good variety.
What has your mother taught you? Feel free to add a comment here. If you are unable to add a comment but would like to add one, try emailing it to me at paulinestips@gmail.com and I will add it for you.

Monday, November 21, 2011

Frugal forum get together

While it's great having lots of on-line access to information such as what you would find on the Down to Earth link, having my mother-in-law here and getting her gardening advice first hand made me realise that at some point it may be beneficial for myself and others to get together face to face. A forum of some sort, where we can meet, have a cuppa, exchange recipes, knitting and sewing patterns, look at each others gardens, help each other make cleaning and other household products, share budget saving tips, etc, would be something I would look forward to. If you live in the Adelaide area and are interested in coming and having a look at what is happening in my garden or my household, I will put up a link that you can email me and maybe we could get a group together. With Christmas coming up, maybe the first meeting could be around that subject, such as making Christmas decorations or edible gifts?

Friday, November 18, 2011

Busy in the garden


Well, my seedlings were doing well until I went away for a weekend and came back to find the bugs had eaten them while I was away. Fortunately on my return I had my mother-in-law with me who is a keen gardener. We bought some seedlings to replace the ones I had lost. Following her advice of not taking on more than I could handle, we planted capsicum, basil, strawberries, eggplant, zucchini, marigolds and spinach. The broccoli, cauliflower, carrots, watermelon and onions will have to wait until I see how successful I am with this lot. My sweetcorn, pumpkin, sunflowers, tomatoes, rockmelon and lettuce are all doing really well. We used some sugar cane mulch around the plants and they seem to be loving it. There are also some leafy twigs placed next to the seedlings to give them a bit of shade.
In the last few days the strawberries are starting to set fruit and the corn has its little seed pods emerging. My mother-in-law advised me to gently water the corn from the top when the seed pods come out to help it pollinate and for the corn cobs to grow. I can't wait to eat fresh corn from my garden.

Monday, October 31, 2011

A use for Tomato Skins

I am looking forward to trying this one.#more

Sunday, October 30, 2011

Make your own candied peel (crystallised peel)


When our orange tree was loaded with fruit, instead of throwing away the peel from eating or juicing the oranges, I looked up the CWA cookbook and made my own candied peel. So here is my recipe based on the CWA recipes combined with what I discovered.

The rind from 6 oranges or lemons
salt
water
2 cups sugar
Castor sugar

The best way to remove the peel is to use a vegetable peeler. That way there won't be any bitter pith on your peel. Cut each section of peel into the equivalent to the amount of peel on a quarter of an orange or lemon.
Make up a brine solution of 1 tablespoon salt to 1 cup of cold water. (Make enough to cover the peel). Stir the salt in the cold water until it is dissolved. Soak the peel in the brine for 3 days.
Remove the peel from the brine, put into clean water, place on stove and allow to boil for 10 minutes.
Make a syrup by putting the sugar in one cup of water and letting it boil until the sugar disolves. Take the peel from the boiling water and put it in the boiling syrup and let it boil for 5 minutes.
Take the syrup and peel mixture off the stove, cover and leave it for 2 days.
Strain off the syrup into another pot and boil the syrup up again. Put the rinds in and boil until semi-transparent (about 20 minutes).
Take out the rinds and lay them flat on baking paper. Put a little bit of syrup in the centre of each, and sprinkle with castor sugar. Don't put too much on as it won't dry out very well. Dry it out a little in a cool oven.
Once cool and dried out (the peel will still be soft, much like fruit leather), place in an airtight container. This will keep indefinitely. I put one lot in a jam jar and another batch in an ordinary plastic container.
I have used mine in my Christmas Cake recipe.

My Christmas Cake


This year I used the peel from the oranges on my orange tree to make crystallised peel. So I have been looking forward to making my Christmas Cake for quite a few months, and finally did it today. If you have just read Sweet Poison, or are diabetic, best you steer clear of this recipe as it is very high in fructose. Instead of making one big cake, you could divvy it up into smaller cake tins and give them away as gifts. You have to have the oven on for a long time, so don't try this on a hot Australian summer's day. The photo is of my cake going into the oven today.
Ingredients:
500g currants
500g raisins
250g sultanas
125g dates
125g crystallised ginger
125g crystallised cherries
125 crystallised peel
125g blanched almonds
1/2 cup dark jam
1/2 cup orange juice
1/4 teaspoon almond essence (I don't use it as I don't like the taste of almond essence)
1/2 teaspoon vanilla essence
1/2 cup crushed pineapple with juice
1 tablespoon grated orange peel
1/4 teaspoon lemon essence
1 tablespoon cocoa or carob powder
1/2 teaspoon nutmeg
250g butter
5 eggs
2 1/2 cups plain flour
1/2 teaspoon bicarb soda
1/2 teaspoon cinnamon
250g brown sugar

Method:
Line the bottom and sides of a 9-10 inch round or square cake tin. I used one of both as this makes a lot of mixture.
Mix fruits and nuts together, cutting to similar sizes.
Mix together orange juice, rind, jam, pineapple and essences.
Sift flour, cocoa, bicarb and spices together.
Mix about 1 cup of the flour mixture into the fruit mixture.
Cream butter and sugar until light and fluffy. Add eggs one at a time and beat thoroughly after each egg.
Mix in liquid jam mixture.
Add fruit and flour alternatively and stir in until cake mixture is even in texture.
Put into prepared tin.
Bake in a very slow oven (250 F or 120C) for 5 hours or until cooked.
This is a very heavy cake (6 1/4 pounds or almost 3kg).
Skewer should come out clean when cooked.

Cheap & cheerful Christmas decorations the kids will love to make


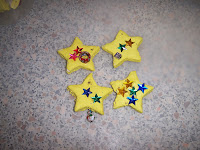
Here is something the kids will have fun making for Christmas...and it's so cheap to make. My 2 year old son enjoyed helping me make these. We made the shapes one day, painted them another day (as our food colouring came out rather pale) and when the paint was dry, my son selected the decorations and told me where he wanted them glued on.
Cooked Playdough Decorations
2 cups plain flour
1 cup salt
1 tablespoon oil
1 cup hot tap water
food colouring or non-toxic paint
pva glue
decorations

1. Mix all dry ingredients in a bowl.
2. Mix hot water, oil and food colouring in a jug.
3. Pour liquid into dry ingredients. Stir until well combined
4. Knead well on a floured surface
5. Roll out to 1cm(half inch) thick
6. Cut out using Christmas themed cookie cutters. You can stick a hole in the top if you wish to hang the decorations off the tree.
7. Bake in moderate oven until hard.
8. Allow to cool and then paint (if desired). Use PVA glue to add decorations.

Wednesday, October 26, 2011

Make your own hankerchiefs


Now, you may wonder why I would bother making my own hankies? Firstly, I never seem to be able to find decent ladies hankies in the shop. They are usually thin, small and don't last very long. Secondly, I have quite a few scraps of material that are too small to make anything else out of.
This is how I did it:
1. Iron material to get rid of creases before cutting into large squares. I used an existing hanky as a template.
2. Using the rolled hem setting on my overlocker, I went around all the edges. If you don't have an overlocker, you could fold over the edges twice, press with a hot iron and sew into place.
3. (Optional - after overlocking, for a more refined finish). Fold over the edges and sew into place, securing at the corners.

There you are, it's that easy (if you have a sewing machine and/or overlocker). I made a dozen hankies in a very short space of time.
In this photo, the white handkerchief is hemmed using an overlocker only and the green one was firstly done with the overlocker, then finished off with the sewing machine as in step 3. Incidently, I am making a dress with the green material, so now I will have a matching handkerchief.

Tuesday, October 25, 2011

More action in the garden

My next door neighbour gave me some rather large tomato seedlings today. He has been waiting for me to get the mounds ready, but I have been too busy. He gave them to me today saying they were overdue to be planted in the ground. So I very quickly got a patch ready, and am now hoping I haven't rushed it too much.
I noticed today that the pumpkin and eggplant have germinated...very exciting!
I'm glad to say that the beer snail traps I made the other day seem to be working!

Don't be afraid to use your breadmaker

It's amazing how many people tell me they have a breadmaker, but it's in a box and they never use it. My then boyfriend, now husband, gave me a breadmaker for Christmas in 1999, and it's been used weekly ever since. We've even taken it camping (when staying in a powered site) and had it with us when we bought a caravan (trailer home for my US visitors to this site) and started travelling around Australia. He did his homework well, asking people he knew had one which was the best one to get. It's a Panasonic, which I also knew at the time had a really good reputation for being a good breadmaker.
Since then I have used it to make countless loaves of bread, foccaccia, pizza bases, apple challah, bread sticks (grissini), panettone, bagels, bolillos, monkey bread, sourdough and have even tried making cakes in it.
If you have tried using your breadmaker but have found the results haven't been great or inconsistent the best piece of advice I can give you is use kitchen scales to measure the flour. If you are using measuring cups to measure the flour, you will find the results inconsistent as there is often air trapped in the flour which makes one cup of flour different every time.
If you are short for time, use the bread mixes available in supermarkets and breadmaking shops instead of having measure out every single ingredient. It has surprised me how many people don't know about the bread mixes. All you need to do is add yeast and water along with the mix.
My breadmaker has a timer function, which means I can pop the ingredients in the breadmaker for a loaf of bread, press the button, and have it ready in the morning. That gives it time to cool down ready to cut for lunch.
My foccaccia and bread sticks have always been a hit at parties. (I know many of my friends read this blog who have tried them). I have even made breadsticks for a wedding. Both are extremely easy to make. You can use the recipes in the manual that come with your machine or there are many good breadmaking books available or look on line. I have a bread making book but find that I usually have to add more water than what it says in the book. If you look in your breadmaker while it is mixing, check out if the ingredients look too dry and add a little extra water at a time.
So go on, get that breadmaker out of it's box and start using it. It's cheaper than a trip to the bakery every time you want a loaf of bread or something special.

Monday, October 24, 2011

What does being frugal mean to me?

Let's get it straight, being frugal does not necessarily mean being cheap. In the article in the October edition of the Australian Women's Weekly Why We Crave The Simple Life it is defined as "...philosophy for living, which is to spend less, live more, reduce your possessions and increase your self sufficiency."
I'm trying to become better at reducing waste. Instead of throwing scraps in the bin, I try to think of ways to use them. I plan to use some of my material scraps to make my own handkerchiefs, I put my vegie scraps in the compost or make stock with them. For years our friends have laughed, but my husband and I share a tea bag when making a cuppa...not because we're trying to be cheap, but because we discovered you can get two perfectly good cups of tea out of one tea bag. It seemed wasteful to use more than what we need.
For me it also means working out how economical something is. For example, I'm allergic to bleach so about 7 or 8 years ago we bought some Enjo products. Some of those are now starting to need replacing and I have organised a consultant to come around to my place so I can work out what I need to get. You might think that $99 for a floor fibre is expensive, but over it's lifespan it has worked out to less than 30cents each time I mop, which is about once (sometimes twice) per week.
I cook meals from scratch, make my own sauces and find it not only cheaper but tastier than the shop bought alternatives.
I bought some disposable nappies this week and cringed when I saw that nearly half of the total at the checkout was the cost of the nappies. I walked away endeavouring to do better with my cloth nappies.
As for being cheap, setting up a vegie patch has costs initially, especially if it doesn't work out. However I have done it before and I am driven to do it again. Growing your own vegies is cheaper in the long run with added benefits. You don't have to go to the shop to get it, thus using fuel which is expensive these days. Nor does it require any packaging. You also know what has been used on it to keep the bugs away.
What does being frugal mean to you? Why not add your comment here so it can be shared with everyone?

Sunday, October 23, 2011

Save money on cake decorating


Have a special event coming up? Like a special cake but can't justify paying $35 plus from a cake shop? Here are my tips...
1. If you don't want to bake and decorate the cake yourself, ask someone else to do it. I made a cake for the South Australian Moke Club's 40th birthday on Saturday. There were 56 people there and the cake cost less than $20 to make and decorate. However, it did take time to do it. Alternatively, you can buy an un-iced cake and just do the decorations.
2. If you have the time and the inclination, bake and decorate the cake yourself. I wasn't very good at making icing until I bought the Australian Women's Weekly Children's Birthday Cake Book. The trick to good icing is to beat the butter for quite a while, until it turns white. Using lollies (sweets) as decorations is especially handy if you are not good at using (or don't have) a piping bag with attachments.
3. Buttercake recipes are most likely to please everybody and are easy to make for the novice baker. Not everyone likes chocolate or fruit cakes. You can jazz up a buttercake by adding a layer of jam and cream between the layers of cake. The Moke Club cake I made had two layers of cake (the equivalent of 4 quantities of my buttercake recipe and I used my lamington tray to cook them in). I used my home made jam with whipped cream in between the layers of cake.
4. Cook the cake(s) the day before as day old cakes are easier to ice and decorate, especially if you are cutting shapes out of the cake (see my Hickory Dickory Clock cakes and "Bay to Birdwood" car cakes that I made for my son's 2nd birthday).

Pests in the garden


Six o'clock already and I was just in the middle of a dream......well, just as I was waking at 6 am the pests were busy chomping away at my vegie seedlings, basil and strawberries. While my garden spray works well on my fruit trees, it doesn't keep the ground dwelling creepy crawlies off the low lying plants. I was up this morning picking snails and millipedes off and one of my first jobs this morning was to crack open a can of beer and make some beer traps. Cut some flaps in the side of a plastic drink container and bend the flaps down to make ramps. Bury teh plastic container in the soil so that the flaps touch the ground (so the snails can get onto them) and pour in the beer. Keep the lid on the container to stop any rain getting in. This trap is safe for dogs and kids as they can't get into them and there isn't anything poisonous. Another job for me to do today will be to collect the flowers off my pyrethrum plants and make some pyrethrum spray.
As for the left over beer, I let it go flat then made some beer sourdough starter.
What are you doing on your Monday morning?

Wednesday, October 19, 2011

A busy day in the kitchen


I have spent most of today in the kitchen. This photo shows me washing dishes while dinner is cooking in the slow cooker on the bench. I put the scraps from dinner preparations into the saucepan to make some more of my garden pest repellant. Cooling next to it are some hamburger buns for tomorrow nights dinner (I have a bread maker). In the oven are some scones. On the bench on the left is a container with alfalfa growing in it. Next to that is a glass jar with vinegar and lemon peel in to make my next lot of citrus cleaner. Next to that is my yoghurt maker. I added some milk to the remaining few tablespoonfuls of yoghurt that I had, so it will be interesting to see if I can make yoghurt that way.
My next job is to clean my kitchen, using the citrus cleaner that I have made from my first batch. After that, I think a nice cup of tea will be in order, with a scone. I would put some of my home-made jam on it, but I've just read Sweet Poison, so am staying away from sugar (and the kilos are dropping off me).

Thank you

I can't believe my site is getting so many hits (150 as I write this), and they are from all over the world! Mostly from Australia, but there are hits from the US, Indonesia, Germany, Thailand...very exciting! Feel free to join as a "follower".

Monday, October 17, 2011

Chicken, mushroom and asparagus cream pasta bake (with cost breakdown)


I made this for dinner last night and worked out how much each ingredient cost to get a total cost as well as a cost per serve. At just over $3 per serve, you can afford to eat the best free-range chicken!
Ingredients:
375g pasta - I used large vegie spirals but you could also use something like rigatoni - $1.69
60g butter - $50c
600g chicken breast fillets, diced into 1cm pieces. I used free range chicken - $9.61 (My husband said it had too much chicken in it, so you could use about half the chicken)
100g button mushrooms, sliced thinly - $1.00
2 tablespoons plain flour - 5c
2 cups milk - 55c
1/2 cup coarsly grated romano cheese - $1.24 - you could use parmesan
1 1/4 cup coarsly grated cheddar cheese - $2.20 (I found it a bit too cheesy for my liking, so will be using half the amount of cheese the next time)
170g (1 bunch) asparagus, trimmed, chopped coarsly - $2 (I used fresh asparagus and microwaved it a bit, but you could used tinned asparagus)
1/4 cup parsley, optional - free from my garden

Total cost - $18.84
Serves 6, so cost per serve is $3.14

1. Preheat oven to 200 degrees celsius (180 fan forced). My oven is in farhenheit, so I put it on 400 degrees F.
2. Cook pasta in a large saucepan of boiling water until tender. Drain.
3. Meanwhile, heat a third of the butter in a large frying pan. Cook chicken in batches until brown and cooked through.
4. Heat remaining butter in same pan, cook mushrooms, stirring, until tender. Add flour, cook, stirring 1 minute. Gradually add milk, stirring over medium heat until mixture boils and thickens. Stir in chicken, 1/4 cup of romano and 3/4 cup cheddar and the asparagus.
5. Combine chicken mixture and drained pasta in a 2.5 litre (10 cup) capacity ovenproof dish, sprinkle with remaining cheeses. Cook, uncovered, in oven, about 15 minutes or until top is browned lightly. Sprinkle with parsley to serve.
(Recipe adapted from Australian Women's Weekly Chicken Favourites)

For those of you with children, my two year old loved it, except for the asparagus.
As I mentioned above, I found it to be too cheesy. If you halved the cheese, you could probably make this for less than $3 per serve. Non free-range chicken is also half the price of free-range chicken, but doens't taste as good.

Sunday, October 16, 2011

Save money on haircuts


I have been cutting my husband's hair for 12 years now. It all started because my husband wasn't happy paying for a hair cut only (No. 2 with the clippers) only to go home and find the hairdresser had missed a bit. So he bought some clippers and I started doing it for him. Just over a week ago my 2 year old son was watching me cut hubby's hair and asked me to do his too. Seeing that he is now refusing to let the hairdresser near him with a pair of scissors, I obliged. At first I was nervous, holding electric clippers anywhere near his head, especially around his ears. However, he sat on hubby's lap and sat very still. I was relieved at the end as it now meant a saving in how much hairdressing bills cost us each month. Brendon's haircuts were costing me about $19 each 4 or 5 weeks. By cutting both hubby and son's hair, we are saving about $450 per year. That is quite a significant saving. (Think of what you could do for the same money!).
If you are considering doing hair cuts at home, here are some pointers. Buy a good quality pair of clippers and hairdressing scissors (if you are going to use clippers) from your hairdresser. Don't bother buying cheap ones from large electrical suppliers, in my experience they last one hair cut before they die. We paid about $100 for our clippers and No. 2 comb about 7 or 8 years ago, and they are still going strong.
The Workers Education Association also run home haircutting courses, which I might enrol in next time it is on.
Sweep up the hair that you have cut off and put it in your compost bin.

Saturday, October 15, 2011

DOWN TO EARTH: On my mind ...

DOWN TO EARTH: On my mind ... A lovely sunny day has lots on my mind. What to do with lawn clippings (while I watch my husband mow the lawn), knitting, making my own cleaners, preparing a vegie patch and so much more.

Lawn Clippings


What do you do with lawn clippings? Surprisingly, they don't make very good mulch or compost. They tend to stop water getting through to the soil below. I am currently preparing a vegie patch and am removing old plants and grass where the vegies are to go. My husband has sprinkled the lawn clippings over some of the weeds and grass in that area, which will help to kill them off making them easier to remove. Use your lawn clippings on areas where you don't want anything else to grow.
Of course, my son likes to help Dad with his chores!

Making your own pyjamas


I recently went to buy some pyjamas but was surprised at how expensive a cheaply made pair was. So I decided to make my own. Now, I am only a learner when it comes to sewing, but thanks to tips from my mum and what I learnt from a sewing course at the Worker's Education Associaton (WEA) I can now make clothes good enough to wear in public. I bought a Simplicity pattern that not only will make pj's for me but also for my husband and son. I thought that was good value. I picked some material I liked and, ta-daaa, here are my pj's. For the same money that I could have bought one pair of pj's from a department store, I bought a pattern that I can re-use and enough material for two pairs of pj's.
One piece of advice that I remembered only after I tried the pj's on after sewing was that I should have pinned the pieces together and tried it on for size before sewing. Even though I took my measurements before commencing and used the size recommended on the pattern, when I tried it on it was too big. I had to unpick it and start again. For some of the pieces in the top I had to cut new pieces out altogether.
I wore these for the first time last night and they pass the sleep test with flying colours! As for the scraps of material left over, I will be using them in my vegie patch to make ties for tomato plants, etc. Cotton material can also go in the compost bin.

Thursday, October 13, 2011

Growing alfalfa sprouts

Another way to save money if you don't have much time or space is to grow your own sprouts instead of buying them. I like to have sprouts on salads and in sandwiches, but used to find that, if I bought the smallest punnet I could find, I still wouldn't get through the whole punnet before the sprouts would start to go slimy. Last week I went Goodies and Grains next to the Adelaide Central Markets and found they sold packets of seeds for sprouts. I bought some alfalfa seeds, followed the directions on the packet and yesterday harvested my first batch. It has worked out to be quite economical, as for the same price of a punnet of sprouts, I bought a pack of seeds and only make up the amount I intend to use at a time. I used a clear plastic container to grow them in on my kitchen bench. This is something you could do if you work full time and don't have room for a garden. All you need to do is rinse the sprouts 2 to 3 times per day until they have grown, then you can eat them. It only takes 3 or 4 days before they are ready to harvest.

Make your own yoghurt using a yoghurt maker

You don't have to go the extent of planting a vegie patch to save some money, you can do simple things like make your own yoghurt. It doesn't require electricity, much time or space. I have an Easy Yo Yoghurt Maker, so all I need is a packet of yoghurt mix and some water. The packets costs between $3 to $5 and make 1 litre of yoghurt. I like to use the Greek Yoghurt mix as it is nice and creamy and doesn't contain added sugar. You mix the yoghurt mix in with some water and place the container into the cannister containing boiling water. Then you leave it overnight on the kitchen bench, and in the morning you have fresh yoghurt. Great for making naan breads! The yoghurt lasts for about a week. You can also add your own flavouring to the plain yoghurt mixes. My mother-in-law once told me how I could make yoghurt using existing yoghurt instead of the powdered mix. I would like to have a go at that and will keep you posted, as that should work out even cheaper.

Wednesday, October 12, 2011

Blocked drains? Environmentally and budget friendly advice from our plumber

Our house was built in the 1950's, so our plumbing is quite old. Throughout the year our drains block up, especially the shower drain (my husband blames my hair!). I asked our plumber for advice on clearing our drains. He said to throw away the commercial drain cleaners that you buy from the supermarket, as they only make the problem worse. They form a gel further down the pipes, which in turn causes more blockages. He suggested using bicarb soda and vinegar. Try sprinkling half a cup of bicard into your drains. Follow it with half a cup of vinegar and let it bubble for a while. When the bubbles subside, flush it out with boiling hot water (from the kettle). Repeat if necessary. This is best done from time to time to keep the drains clear rather than waiting for a blockage.

Cheat with meat - make your dollar go further with these Creamy Meatballs

With the rising costs of living, you may be looking for ways to feed the family on a tight budget. Meat can be expensive, so here is a way to make minced (ground) meat go further - mix tofu into it. Now, before you go thinking that tofu is a bit way out for you, it's cheap, comes in many forms and is packed full of protein, not to mention often healthier than meat. Tofu doesn't have much flavour but absorbs the flavour of whatever you put it with, hence a great substitute for meat.
When I buy mince I always buy the best quality I can find. The one I usually buy is around $14 per kilo at my local supermarket. For this recipe I used Silken Firm tofu. If you haven't used tofu before, you can usually find it in the fridge section of the supermarket in the vicinity of the fresh pastas and yoghurts.
This recipe originally had 300g of minced pork and 300 g of minced beef. I used a 300g pack of silken firm tofu instead of the pork. This recipe is for a slow cooker but you could do it all in a fry pan just as easily
Ingredients
3 slices day old crusty bread
185ml or 3/4 cup of milk
300g beef mince
300g silken tofu
60g or 1/4 cup grated onion
1tsp salt flakes
1tsp ground white pepper
1tsp coriander seeds
1/4 tsp ground allspice
2tbsp olive oil
125ml or 1/2 cup chicken stock
125ml or 1/2 cup cream (I used yoghurt for a healthier alternative)

Method
Roughly chop the bread and place in a bowl. Pour the milk over the bread and set aside for 5 minutes. Squeeze out and discard most of the milk.
Combine bread, mince, tofu, onion, salt flakes and spices in a bowl using your hands. Form mixture into 24 meatballs.
Heat half of the oil in a fry pan and brown half of the meatballs. Transfer to slow cooker and repeat with the rest of the oil and meatballs. Pour stock and cream into slow cooker to cover the meatballs. Cover and cook on low for 3 - 4 hours or until meatballs are cooked through.
You may like to stir through some chopped dill just before serving and top with grated lemon rind for extra zing.
This recipe has been modified from "Slow Cooker, through it in and let it simmer" by Murdoch Books.

Tuesday, October 11, 2011

Cook dinner, make stock and an insect repellant garden spray all at the same time

Last night I made celery and asparagus risotto with steamed carrots and corn cobbs for dinner. Instead of throwing the food scraps straight into the compost bin, I decided to put them to some use. While the risotto was cooking, I put the onion and garlic skins and off cuts into a plastic bucket to be used in my insect repellant spray. I put the carrot peelings and off cuts, aspargus and celery offcuts (including the leaves from the celery) into a pot of boiling water. To that I added some bay leaves and black peppercorns. That boiled away while dinner was cooking. At the end, leave the stock to cool then place into a container and pop it in the fridge or into the freezer for later use. Then I put the scraps into my compost bin by the kitchen sink, to be put in the compost bin in the garden when it is full.
To make the insect repellant garden spray, boil any left over onion scraps, garlic and chilli. I do have a proper recipe for this somewhere and will add it to the blog when I find it. Basically boil it until everything is well and truly tender, I would probably do it for an hour. Then leave it to steep for a day or two. Mix hot water in with some laundry soap flakes until the flakes have dissolved. Strain the onion mixture and add the liquid to the soap mixture and allow to cool before applying to plants. I then add the solids from the onion mixture to my compost bin.
So basically, out of one lot of ingredients, I made three things. And the good thing was, the only items to go into the bin were a bit of wax off the Romano cheese and some plastic wrap that the corn came in (I now endeavour to buy corn cobbs from the Adelaide Central Markets where they aren't wrapped in plastic like my local green grocer's). And yes, the vegie scraps did eventually make it into the compost bin, but only after I had some use out of them!

Ride to work day

It's ride to work day today and my husband was busy getting his bike ready last night. He headed off for work a bit earlier than what he usually does as his ride will be about 20kms or so, and will take longer on the bike than in the ute. It will mean that he will also be home later, but the upside for him is that he gets some exercise into his day rather than sitting in a vehicle for all that time. Another upside is the saving on diesel. Although we have a long range fuel tank on the ute, it still costs us about $100 to fill up every 4 to 6 weeks. If he goes well today, he is considering riding more often. This will save fuel as well as wear and tear on the ute. My only concern is the other vehicles on the road, however he assures me that the map he downloaded off Cycling SA has shown him a safe route to go to avoid all the trucks.
I would have taken Brendon to his swimming lessons on my bike but I have a flat tyre and no time to fix it this morning. I will have a look at it on the weekend so I can also use my bike more than having to use the car. One problem is the lack of storage on the bike, especially when there is a child seat on the back!

Monday, October 10, 2011

The Nappy Debate


For those of you considering what to do about nappies, here are some notes from my experience.
I have used a combination of old fashioned cloth nappies, modern cloth nappies and disposables. Old fashioned cloth nappies are handy because you don't need to keep going down the shop to buy more. They require soaking, but after that you just put them through the washing machine and hang them out on the line. The sunshine helps to kill any bugs hanging around. The biggest downside for me is trying to find pilchers, especially in the larger sizes. I was able to size 1 and smaller from Target, but for size 2's I had to go to Baby Bunting. They have now told me they won't be stocking them anymore as it will be discontinued stock. I only have two size 2's and they are often both soaking in the bucket at the same time, so I will need to track down another supplier.
As for modern cloth nappies, they don't require soaking and can go in the wash with all your other laundry. I used Pea Pods which were fantastic when Brendon was a newborn. They were just as convenient as a disposable nappy. However, as Brendon got bigger and needed a bigger size I found a downside to their design. The pilchers got bigger, but not the insert, leading to leakages and flooding. They are still very good but I no longer use them for Brendon to sleep in. Pea Pods are one of the cheapest modern nappies you can get, at around the $17 the last time I bought some. Your Child's Nursery in Adelaide, South Australia, has a good supply of them.
Disposable nappies may be convenient, except for when you run out and have to dash to the shop to get more, but I have found them to be the most costly option. I use them for when we go out, when Brendon is sleeping, or for when I haven't kept on top of load of nappies that need washing. Occassionally I use them when Brendon has a rash or when I'm having one of those "can't be bothered" days!

Things to do with citrus peel

A few months ago when our orange tree was laden with fruit, every time I peeled and orange I thought it a shame to just throw the peel into the compost bin. I have since heard that citrus peel is not good for compost, as worms don't like it. Here are some alternative uses for the peel:
Make candied peel - good for the Christmas cake or Hot Cross Buns. If anyone is interested in the recipe for candied peel you could look in the CWA cookbook or let me know and I will publish it on this site.
Make a citrus cleaner - refer to the website justlikemynanmade.blogspot.com.
It is important to remember with both ideas that the pith needs to be removed from the skin.
I am looking forward to using my candied peel in my Christmas cake this year. I have made the candied peel but haven't used it yet. I have two jars of the citrus cleaner sitting on my kitchen bench which should be ready to use in another week or two.

Knit your own dish cloths


It might seem like a strange thing to do, knitting your own dish cloths, but when you make yours you will see the advantages. I first came upon this while visiting relations and saw one that my soon-to-be sister-in-law had made. I was given some of the wool and have made a few of my own. They are the best dish cloths you will ever come across, and it's not just me who thinks that. My husband says so too.
To make one you will need some Anchor Magic Line or Bendigo Mills Cotton yarn, as well as some knitting needles. I used 4mm needles, but you could use a different size depending on your tension or preference.
Cast on as many stitches as you like, it all depends on how big you want to make your cloth. I have made two sizes and for the one that is pictured here I cast on 30 stitches. I did one of 40 stitches and have found that one to be a bit big.
I then did 4 rows garter stitch followed by 4 rows of rib (knit 2 purl 2). I repeated this until I reached the desired size. The varied texture by using garter stitch and rib stitch helped to create a cloth that is good for scrubbing dishes without being abrasive.
These dish cloths can be chucked in the washing machine, no special washing instructions required. They tend to get a bit smelly, so when they start to smell, it's time to put them through the wash.

Home made muesli bars


This recipe is a real winner in our household. It is adapted from the Muesli Slice recipe in the Australian Women's Weekly Healthy Babies cookbook, but is great for all the family. The good things about making your own muesli bars is you know what goes into them, they're cheap and really easy to make, and don't require any packaging (unlike the shop bought ones)...and they are yummy.

Ingredients:
1 1/2 cups cornflakes
1 cup rice bubbles (I often use puffed millet for a healthier and cheaper alternative)
1 1/2 cups rolled oats
1/2 cup shredded coconut
400g can of skim sweetened condensed milk.
I also add any variation of the following: sultanas, craisins, currants, cranberries, pepitas, sesame seeds, nuts.
Mix all ingredients together in a large bowl. Press the mixture firmly into a 24cm by 32cm swiss roll pan. Bake in oven at 160 degrees celius or (or 140 if you have a fan forced oven). My oven is so old it is still in Farhenheit (325 degrees). Cook for 40 minutes or until browned lightly. If you like your muesli bars crunchy, you may like to turn it over to brown the other side or cook longer. Allow to cool in the pan. Lift slice from pan and cut into bars.

Starting my vegie patch


One advantage to having a bit of a yard (790 square metre block) is that I have room for a garden. While flowers are lovely to look at, we can't eat them. With the rising costs of living I have decided to rip out any plants I'm not keen on and replace them with fruit and vegies. My garden was starting to look like a jungle, as it hadn't had much attention from me since I gave birth two years ago. Now that Brendon is old enough to play happily outside, I have spent the last two weekends in the garden, ripping out the jungle, deciding what will stay and what will go. In my garden I have an orange tree, apple tree, plum tree, lemon tree and an olive tree. I also have lemon verbena, parsley, mint, rosemary, thyme and oregano. I have recently planted some lettuce, strawberries and basil. I plan to plant onions, potatoes, pumpkin, butternut pumpkin, broccoli, cauliflower, spinach, eggplant, capsicum, celery, carrots and rockmelon. These are all things that appear regularly on our shopping list. Another weekend of ripping stuff out, then I should be ready to start preparing the garden beds and planting.